Showing posts with label ODI. Show all posts

Sunday, October 9, 2016

LOG Levels in Oracle Data Integrator


     List of LOG Levels in Oracle Data Integrator


    0=>  No Log  
   
    1=>  Displays the start and end of each session

    2=>Displays level 1 and the start and end of each step

    3=>Displays level 2 and each task executed

    4=>Displays the SQL queries executed, as well as level 3

    5=>A complete trace, inclueds level 4
   
    6=> Log level 6 has the same behavior as log level 5, but with the addition of variable tracking while
           execution or restarting  jobs.

Saturday, October 8, 2016

ODI getSession object parameters usage.


We can find below listed parameters for odiRef.getSession  method parameters.


SESS_NO
Internal number of the session
SESS_NAME
Name of the session
SCEN_VERSION
Current scenario version
CONTEXT_NAME
Name of the execution context
CONTEXT_CODE
Code of the execution context
AGENT_NAME
Name of the physical agent in charge of the execution
SESS_BEG
Date and time of the beginning of the session
USER_NAME
odi User running the session.

Examples


The current session Number is: <%=odiRef.getSession("SESS_NO")%>
The current User is: <%=odiRef.getSession("USER_NAME")%>
The current Session Name is: <%=odiRef.getSession("SESS_NAME")%>
The current agent name is: <%=odiRef.getSession("AGENT_NAME")%>

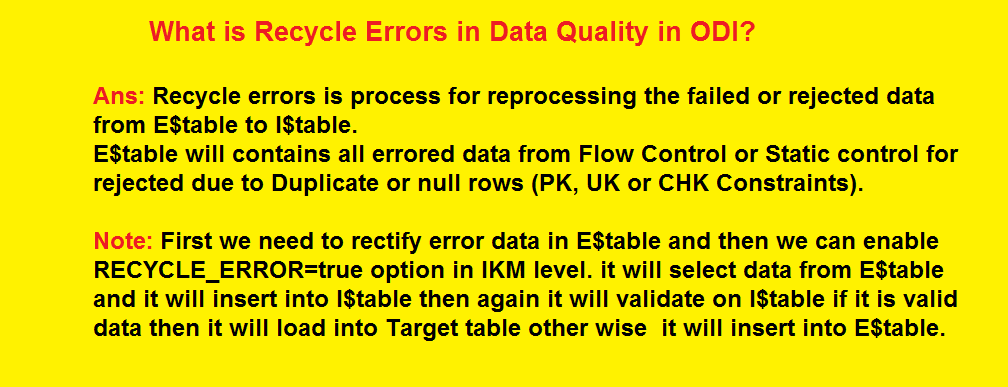
What is Flow Control and Static Control and Recycle Errors in Oracle Data Integrator?


What is Flow Control and Static Control and Recycle Errors in Oracle Data Integrator?


Thursday, June 18, 2015

History of Oracle Data Integrator


History

Ø  Originally Developed by SUNOPSIS acquired  in 2006


Ø  Originated Extract Load and Transform(ELT) as alternative ETL


Ø  Data Movement between Heterogeneous Data Sources


Ø2006 : Great success with ELT Tool version 3


    10.1.3.2.1 – Apr 2007
    10.1.3.3.0 – Se 2007
    10.1.3.3.1 – Oct 2007
    10.1.3.3.2 – Dec 2007
    10.1.3.3.3 – May 2007
    10.1.3.4 – Aug 2008
    10.1.3.4.1 – Apr 2008    

    ODI 11G

        11.1.1.3
        11.1.1.5
        11.1.1.5.2
        11.1.1.6
        11.1.16.2
        11.1.1.7
          12c

Wednesday, May 20, 2015

ODI 11g reporitory backup and migration

Today we will discuss about the basic things needs to be done to take the repository backup. Normally we can take the backup in two ways that is either from Odi Studio or from the database where the repository lies. Refer this post for taking backup in database level.
Many newers wont feel confident while taking backup in  Odi Studio.  Below screenshots will help you to take the backup for future references. In this case I have only taken the minimum things for initial stage but you can take the backup of logs, security settings , technical env etc.
repobackup1

repobackup2
Always export to zip file so that all components will be bundled together. Thats the better way I believe.
repobackup3
Click Ok.
repobackup4
Now here you can take the backup of master repository which normally keeps all topology and security components. If you want to take backup of only topology then just export it.
repobackup5
Logical topology is  very important as it will keep all logical connection/logical schema across multiple contexts.
repobackup6


Now you can import them in same manner. Its better to import the topology, logical topology and work repository respectively.
Keep in mind that its better to have different id for the target repository. You may get some pop-ups like the id is not declared in the target repository. If you see this then click on yes to declare the id in the new repository. You may get this multiple times.  So keep on clicking yes till you dont see the popup.
repobackup7

repobackup8

repobackup9

Similarly you can import topology and logical topology. Thats all. Let me know if you face any issue.

ODI 11g Smart Export and Import a Single interface

Oracle Data Integrator 11.1.1.6.0 introduces a major new feature called Smart Export and Import. This post will give you an overview of this feature.
ODI export and import feature has been used in previous releases to move ODI objects in and out of ODI repository. Smart Export and Import builds on top of the existing ODI capabilities to avoid common pitfalls and guide end users through the process.

Let’s take an example of an ETL developer who wants to export two interfaces (Load_Dept and Load_Sales) to another repository. One of these interfaces (Load_Dept) uses a temporary interface (Load_Dept_temp_interface) and there are associated Data Stores and Model for source and target.
The following screenshots gives you an example with 2 interfaces that need to be exported.

By doing a Smart Export of these two interfaces we can create an export file which has all the dependent objects. In this case temporary interface Load_Dept_temp_interface and Data Stores from Model Sources will be exported in the same xml export file. The dependency is discovered by the smart export process and there is no need to export all the dependent objects one by one.


On the import side the same export file will be used to do a Smart Import. The Smart import process finds the objects in target repository that best matches with the objects in the export file and provide action choices to the end user. These choices are Merge, Overwrite, Create Copy, Reuse or Ignore. It is also possible that there may be some mismatches and Smart Export gives warning messages and action options to fix it. The resolution actions are Ignore, Change, Do not change and Fix Link.


User can also save the actions in the response file which can be used in the silent mode.
In earlier releases import of individual objects required a careful planning of exported objects and import order of the objects based on dependency. The new Smart Export and Import process makes this task very simple.

ODI-26016: The requested operation cannot succeed. The object no longer exists.

Error code:ODI-26016: The requested operation cannot succeed. The object no longer exists.

Cause: The specified ODI object cannot be accessed because it no longer exists in the repository (it may have been deleted by another ODI user or some other manual import). 

Action: Recreate the specified ODI object. Consider importing the object from a backup.If you have made export/import or smart export/import repeat that again with insert_update mode the problem will resolve.

Monday, May 18, 2015

ODI-10013: This import action has been cancelled because it could damage your repository.

ERROR:ODI-10013: This import action has been cancelled because it could damage your repository.
This is due to an SNP_LSCHEMA object that has object identifier 32001 that is greater than that for the current SNP_LSCHEMA id sequence.

Cause: some of the tables used in work repository are have no connections defined in physical, logical layer schemas.

solution1:
If you would like to move your source models, target models and project contents from Work repository 1 to another work repository.
I.e. Dev. server to Prod Server.

1. Firstly, replicate the master repository connections i.e. with same naming conventions manually and same changes(physical,logical connection details etc) in Prod.
2. Go to Dev. Server work repository -> File Tab -> Click on Export work repository (save it in a folder)
3. After exporting, you can view the xml files in the folders.
4. Now, Open the Prod. server and make sure you already replicated mas. rep. details.
5. Now, right click on model and import source model in synonym mode insert_update (select source model from the folder where your xml file located)
6. Similarily, import again target then Project.

NOTE: The above procedure is applicable for Smart import/export also.
 

Wednesday, February 25, 2015

Creating procedure, scenario and scheduling it in ODI

odi-10182: Uncategorized exception during repository access Error: ora-00001: unique constraint ( pk_txt_header ) violated

Error: ora-00001: unique constraint ( pk_txt_header ) violated

odi-10182: Uncategorized exception during repository access ora-00001: unique constraint ( pk_txt_header) violated

CAUSE:
The table definition was created by duplicating metadata for another table. Indexes are defined as constraints in ODI, when duplicating the original table object the index definitions are duplicated with the original names, for some reason this does not trigger an error at the time of duplicating the tables, the primary key validation for the index name is triggered –in my case- at the time of saving a mapping where the table duplicate is a target.

SOLUTION1:
On Design > Models look up the duplicate table. Once located review and update the names of each of the constraints / indexes defined on metadata and save them. Once you have completed the review you should be able to save the mapping throwing the original issue message.

or

SOLUTION2:
Please check if all the table names used in interface mapping expressions are in interface source tables list/interface joins list because all the tables in mapping expressions are referenced with tables used in interface table source list.

Monday, February 23, 2015

ODI META DATA QUERY TO GET THE LIST OF PROCEDURES BEING USED IN DAILY RUNNING ETLS(ODI-10G)

--WORKS IN ODI-10G
select
spj.project_name PROjECT_NAME,
SF.FOLDER_NAME FOLDERNAME,
st.trt_name procedure_name,
stx.txt code
from snp_trt st,snp_folder sf,snp_project spj,snp_txt stx
where 1=1
and sf.i_folder=st.i_folder
and sf.i_project=spj.i_project
--and spj.project_name='RILO_FINANCIALS_ETL'
and stx.i_txt=st.i_txt_trt_txt

AND st.trt_name NOT IN

(SELECT DISTINCT
SSS.STEP_NAME procedure_name
--SSS.STEP_TYPE
from
snp_session ss,snp_sess_step sss,snp_session pss
where ss.sess_no=sss.sess_no
and pss.sess_no=ss.parent_sess_no
and TRUNC(SS.SESS_BEG)='12-JAN-15'
--and trunc(SS.SESS_END)='20-NOV-14'
AND SSS.step_type='T'
AND SS.PARENT_SESS_NO IN
(
164111002,
164112002,
164113002,
164114002,
164115002,
164116002,
164117002,
164118002,
164119002,
164120002,
164121002,
164122002,
164123002,
164124002,
164125002,
164126002)
)--CHANGE THE PARENT SESSION NUMBERS TO YOUR ETL SESSION NUMBERS
order by 1,2;

ODI METADATA QUERY TO GET THE LIST OF INTERFACES FOLDER WISE(ODI-10G)

--WORKS WITH ODI-10G
select
spj.project_name PROjECT_NAME,
SF.FOLDER_NAME FOLDERNAME,
sp.pop_name interface_name,
sst.lschema_name,
sst.table_name "source table",
stt.table_name "target table"
from snp_pop sp,snp_folder sf,snp_project spj,snp_source_tab sst,snp_table stt
where 1=1
and sf.i_folder=sp.i_folder
and sf.i_project=spj.i_project
and sst.i_pop=sp.i_pop
and stt.i_table=sp.i_table
--and spj.project_name='RISO_CRM_PROJECT'--PROJECT NAME
--AND sp.pop_name='RISO_SC_HEADER_DIM_INT'; --INTERFACE NAME
and stt.table_name=upper('riso_ra_cust_trx_all');--TARGET TABLE

CODE TO GET THE QUERY FORMED BY INTERFACE USING META DATA(ODI-10G)

--THIS WILL WORK WITH ODI-10G

declare
interface_name varchar2(40)
:='RILO_GL_JOURNALS_FACT_INT';--GIVE YOUR INTERFACE NAME HERE
cursor columns_temp is
select
sp.pop_name interface_name,sst1.table_name source_table_name_1,sst1.src_tab_alias,spc.col_name source_column_names,st.txt column_txt,st.txt_ord
from snp_pop sp ,snp_source_tab sst1,--snp_source_tab sst2,
snp_pop_col spc
,snp_src_set sss,snp_txt st
where 1=1
and sst1.i_pop=sp.i_pop
and spc.i_pop=sp.i_pop
and spc.i_source_tab=sst1.i_source_tab
and sss.i_pop=sp.i_pop
and sss.i_src_set=sst1.i_src_set
and sss.i_src_set=spc.i_src_set
and sp.pop_name=interface_name
and st.i_txt=spc.i_txt_map
group by sp.pop_name,sst1.table_name,sst1.src_tab_alias,spc.col_name,st.txt,st.txt_ord
order by 4,6;
cursor table_temp is
--only tables
select
sp.pop_name interface_name,sst1.table_name  source_table,sst1.src_tab_alias alias_name
from snp_pop sp ,snp_source_tab sst1
where 1=1
and sst1.i_pop=sp.i_pop
and sp.pop_name=interface_name
group by sp.pop_name,sst1.table_name,sst1.src_tab_alias--,sst2.table_name,st.txt
order by 1,2;

cursor where_temp is
--only tables and where clause
select
sp.pop_name interface_name,sst1.table_name  source_table,sst2.table_name  joined_with,st.txt where_clause
from snp_pop sp ,snp_source_tab sst1,snp_source_tab sst2,snp_pop_clause spcl,
snp_txt st
where 1=1
and sst1.i_pop=sp.i_pop
and sst1.i_source_tab=spcl.i_table1
and sst2.i_source_tab(+)=spcl.i_table2
and spcl.i_pop=sp.i_pop
and sp.pop_name=interface_name
and spcl.i_txt_sql=st.i_txt
group by sp.pop_name,sst1.table_name,sst2.table_name,st.txt  order by 1,2;


begin
dbms_output.put_line('------------'||interface_name);
null;
dbms_output.put_line('select ');
for columns_temp_c in columns_temp
loop
dbms_output.put_line(columns_temp_c.column_txt||',');
end loop;
dbms_output.put_line('from ');
for table_temp_c in table_temp
loop
dbms_output.put_line(table_temp_c.source_table||' '||table_temp_c.alias_name||',');
end loop;
dbms_output.put_line('where ');
for where_temp_c in where_temp
loop
dbms_output.put_line(where_temp_c.where_clause||' and ');
end loop;

exception
when others then
dbms_output.put_line('some error in the anonymous block');
end;

/
--REMOVE THE EXTRA COMMAS,AND WHICH FROM THE RESULT