Thursday, May 12, 2016

‘Act As’ Functionality in OBIEE11.1.1.9


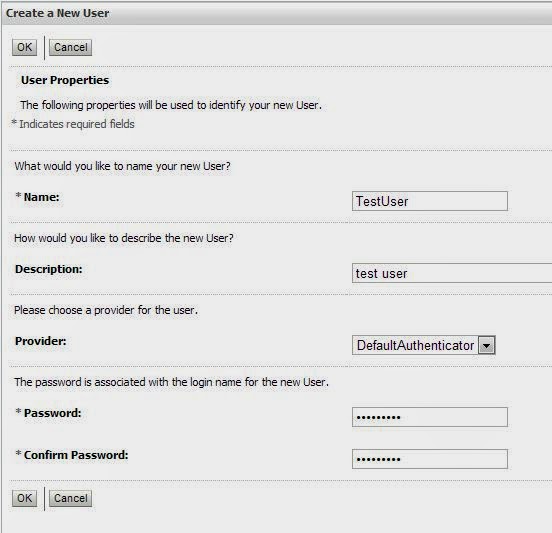
      Create few users here I have created 2 users in my instance or else you can carry on with the existing users if you have some users in your environment. Here I have created 2 users LLAVOIE, PBEAULIEU as an example.

 1. Create a table
CREATE TABLE "RISOBI"."OBEE11G_PROXY"
   (           "PROXY_USER_ID" VARCHAR2(30 BYTE) NOT NULL ENABLE,
                "PROXY_TARGET_ID" VARCHAR2(30 BYTE) NOT NULL ENABLE,
                "PROXY_LEVEL" VARCHAR2(10 BYTE) NOT NULL ENABLE,
                 CONSTRAINT "OBEE11G_PROXY_ACTAS_PK" PRIMARY KEY ("PROXY_USER_ID", "PROXY_TARGET_ID"); 
  2. Insert data into this table.
  3. Create a Session Initialization block PROXY_BLOCK as below:
Use below SQL and Data warehouse connection pool (where the table is created)
SELECT
PROXY_TARGET_ID,PROXY_LEVEL
FROM
WC_PROXY_ACTAS
WHERE
UPPER(PROXY_USER_ID)     = UPPER( ':USER')
AND UPPER(PROXY_TARGET_ID) = UPPER('VALUEOF(NQ_SESSION.RUNAS)')

In the Edit data target window, create the two session variables (Hit yes when asked if we want to use system session variables)
PROXY and PROXYLEVEL

4. Navigate to /data/mhome/Oracle_BI1/bifoundation/web/msgdb path on OBI server and create a folder customMessages if you don’t already see it. 
  5. Create an XML file “LogonParamSQLTemplate.xml“with the following content in it. Verify the highlighted connection pool name is accurate as per the target instance.
 
<?xml version="1.0" encoding="utf-8" ?>
<WebMessageTables xmlns:sawm="com.siebel.analytics.web.messageSystem">
 <WebMessageTable system="SecurityTemplates" table="Messages">
   <WebMessage name="LogonParamSQLTemplate">
      <XML>
       <logonParam name="RUNAS">
       <!-- for EXECUTE PHYSICAL CONNECTION POOL, SQL_Paint.SQL_Paint =  -->
       <!-- SAS Repository physical_dbname.conn_pool_name -->
         <getValues>EXECUTE PHYSICAL CONNECTION POOL "OBIEE11G"."Proxy"
                  select PROXY_TARGET_ID from OBEE11G_PROXY where upper(PROXY_USER_ID)=upper('@{USERID}')
         </getValues>
         <verifyValue> EXECUTE PHYSICAL CONNECTION POOL "OBIEE11G"."Proxy"
                  select PROXY_TARGET_ID from OBEE11G_PROXY where upper(PROXY_USER_ID)=upper('@{USERID}') and upper(PROXY_TARGET_ID)=upper('@{VALUE}')
         </verifyValue>
         <getDelegateUsers>EXECUTE PHYSICAL CONNECTION POOL "OBIEE11G"."Proxy"
                  select PROXY_USER_ID, PROXY_LEVEL from OBEE11G_PROXY where upper(PROXY_TARGET_ID)=upper('@{USERID}')
         </getDelegateUsers>
       </logonParam>
    </XML>
  </WebMessage>
 </WebMessageTable>
</WebMessageTables>

 6.  /u01/upgbiapp/Middleware/instances/upgbi/config/OracleBIPresentationServicesComponent/coreapplication_obips1

Modify instanceconfig.xml to add the below within the ServerInstance tag at the end:

<LogonParam>
<TemplateMessageName>LogonParamSQLTemplate</TemplateMessageName>
<MaxValues>250</MaxValues>
</LogonParam>
   
  7. Logon to analytics to navigate to manage privileges under catalog ‘Administration

  8. Grant Act As privilege to the appropriate OBI role/users(Weblogic)


 9. Restart the BI services to make these changes into effect.
Note:
Before a proxy user can act as a target user, the target user must have signed into Presentation Services at least once and accessed a dashboard.
10.   Now logon as a user who have Act as privilege to verify:
Click on ‘Act As’ link under user name dropdown


Tuesday, April 19, 2016

Split text into different cells

You can take the text in one or more cells, and spread it out across multiple cells. This is the opposite of concatenate, where you can combine text from two or more cells into one cell. For example, if you have a column of full names, you can split that column into separate first name and last name columns, like this:
Before and after of text split into different columns
Go to Data > Text to Columns, and the wizard will walk you through the process. Here’s a full breakdown of how it works:
  1. Select the cell or column that contains the text you want to split.
    Note:  Select as many rows as you want, but no more than one column. Make sure there’s enough empty columns to the right so nothing over there gets overwritten. If you don’t have enough empty columns, add them.
  2. Click Data >Text to Columns.
    Click the Data tab, and then click Text to Columns
  3. This starts the Convert Text to Columns Wizard. Click Delimited > Next.
  4. Check Space, and clear the rest of the boxes, or check Comma and Space if that is how your text is split (Smith, John, with a comma and space between the names). You can see a preview of your data in the Data preview window.
    Step 2 in the Convert Text to Columns Wizard
  5. Click Next.
  6. In this step, you pick the format for your new columns, or you can let Excel do it for you. If you want to pick your own format, select the format you want, such as Text, click the second column of data in the Data preview window, and click the same format again. Repeat for all the columns in the preview window.
    Step 3 in the Convert Text to Columns Wizard
  7. Click the Collapse Dialog Box button image button to the right of the Destination box to collapse the dialog box.
  8. Select the cells in your workbook where you want to paste your split data. For example, if you are dividing a full name into a first name column and a last name column, select the appropriate number of cells in two adjacent columns.
    Select the cells where you wnt to paste your split cells
  9. Click the Expand Dialog Box button image button to expand the dialog box, and then click Finish.
    Expand the dialog box when you're done selecting your cells.

Monday, April 11, 2016

OBIEE 11g: Application Roles, Groups and Users Management


Users can be created in Weblogic Server which is common with all Oracle Fusion Middleware 11g Based Products.

Application roles are nothing but collection of policies and it is defined in Fusion Middleware.

Application role defines the type of accesses given on various type of resources.

Groups and users are mapped with these application roles


OBIEE comes with a pre created set of roles called, Application Roles.

BIAdministrator which has all administrative privileges. The BIAuthor is able to create dashboards and also create analyses. Finally, the BIConsumer is a role where the user can only view existing dashboards and analysis. There is also an additional role that can be created called BIAnalyst. This role enables the user to create an analyses, but not the dashboards and also has viewing privileges like the BIConsumer.

Following are the steps to create user and assign it to Groups and Application role.

1.     Goto Oracle WebLogic Server Administration Console, http://[localhost]:7001/console

2.     click on the Security Realms menu item in the Domain Structure navigation tree menu.

3.     Under Summary of Security Realms page, click on the myrealm.

4.      Click on the Users and Groups tab to create new user.

5.     Press the New button, and then enter the details for the new user:


6.     Similarly you can create new group as well.

7.     To add this user to one of the groups, and therefore grant them the corresponding application role, click on the user in the list of users that’s displayed, and then click on the Groups tab.

      Select any group, for example BIConsumer, from the Parent Groups Available pane, then move it across to the Chosen pane.

We have created a new user and added them to the BIConsumers group. The policies within Oracle Platform Security Services are granted to  this group as group is added to BIConsumer Role in background.

Steps to create the Application Roles in EM (http://[localhost]:7001/em),

          1.      Login to Enterprise Manager with Admin User.

          2.      Click on Business Intelligence and coreapplication

          3.      Go to Security tab and Single Sign on

          4.      Click on Configure and Manage Application Roles

          5.      Click on Create and Provide the Role name and OK

Steps to Add User’s or Groups on Application Role in EM,

1.      Click on Role and Edit the Created Application role

2.      Add the Existing User’s and Groups to Application Role and OK.


Thats the process to create application roles and assigning groups and users under it.

Tuesday, March 22, 2016

[nQSError: 13015] You do not have the permission to set the value of the variable

Error Codes: OPR4ONWY:U9IM8TAC:OI2DL65P
State: HY000. Code: 10058. [NQODBC] [SQL_STATE: HY000] [nQSError: 10058] A general error has occurred. [nQSError: 43113] Message returned from OBIS. [nQSError: 13015] You do not have the permission to set the value of the variable 'As_Of_Date'.


Solution :
 Go to properties of session variable all check the option "Enable everyone to set value"

Follow the below steps :

1. Open Administration Tool. Go to Manager > Variables.

2. Select System or Non-System variable (depends on type of your variable) under the Session  from left pane. Then the corresponding variables will be listed on right pane.


3. Right click on the variable(for which your getting error in presentation service when you tried to change its value) and select properties.

4. check the option "Enable everyone to set value" (by default this option is unchecked) and click OK.


Now, check the request in presentation service. Log out from that session and again login to presentation services and the same report.

Sunday, March 20, 2016

OBIEE Using a MSSQL stored procedure as datasource with parameters

If our stored procedure uses a variable:
[code]
SET ANSI_NULLS ON
GO
SET QUOTED_IDENTIFIER ON
GO
-- =============================================
-- Author:        Kartheek Dachepalli
-- Description:  This procedure returns Account details from Account dimension
-- =============================================
ALTER PROCEDURE sp_dim_Accounts   
@UserName varchar(50) = 'me'
AS
BEGIN
    SET NOCOUNT ON;
    SELECT     dim_Account_ID, Account_Code, Account_Name, @UserName as USERNAME
FROM         dim_Accounts_tab
END
GO
[/code]
You can add the variable by using the VALUEOF() procedure:
 image
@VARIABLENAME = N’VALUEOF(NQ_SESSION.VARIABLE_NAME)’

OBIEE Using a MSSQL stored procedure as datasource

A MSSQL stored procedure can return a table. You can use this table as a normal datasource in your repository.
Let’s  create a basic procedure
[code]
SET ANSI_NULLS ON
GO
SET QUOTED_IDENTIFIER ON
GO
-- =============================================
-- Author:        Kartheek Dachepalli
-- Description : This procedure returns Account details from Account dimension
-- =============================================
CREATE PROCEDURE sp_dim_Accounts   
AS
BEGIN
    SET NOCOUNT ON;
    SELECT     dim_Account_ID, Account_Code, Account_Name
FROM         dim_Accounts_tab
END
GO
[/code]
In the repository create a new table:
image
Make the type stored procedure:
image
Add the columns manually: If we select 'Stored Proc' as table type we need to add columns with data types as shown below.
image
Add the execute script:
while adding the execute code please select your technology. Here I selected sql server 2012 as my database version is 2012.
image
EXEC [DATABASE_NAME].[SCHEMA_NAME].[PROCEDURE_NAME]
You will see that the table symbol has changed:
image
You can now join it as a normal table to the rest of your model.